There are lots of free and paid hosting services available that you can use to publish your website to other people, but the problem is that not all of these hosting services can run various programming languages such as Python, PHP, Node.js, and others. This time we will discuss how to deploy a Flask application to Vercel. Vercel itself can run Python-based applications as well as Node.js-based applications such as React, Next.js, Express, and others.
Deploying a Flask or Python application is not as difficult as you might think, there are many services provided, but we think Vercel does it well, you only need a repository service such as Github, Gitlab, Bitbucket, and others. In this discussion, I use the service from Github to store the source code, which will later be linked to the source code repository. This service to deploy automatically. Without further ado, let's get straight into our main topic.

1. Create a Vercel and Github accounts
Before we enter the coding stage, you are required to first have a Vercel and Github accounts. For Vercel itself, please register first and try it with the "Hobby" tier. You can use the pro tier if you feel this service is suitable for you. And for Github itself, if you don't have a Github account, please create a new account first and create a new repository to store the Flask source code examples that we will provide.
This service can be said to be very dependent on repository management services for managing, deploying, and re-deploying application files, which means it makes it very easy for us to manage all applications quickly and automatically.
2. Create a Flask application project
If you already have a Vercel and Github account, next we will create a Flask project. Some of the files needed include app.py, requirements.txt, and vercel.json. Please create a new folder and open the code editor. For the app.py file, the structure of the folder is something like this:
Project/
├── app.py
├── requirements.txt
└── vercel.json
You can copy and paste the source code from each of these files below:
# app.py
from flask import Flask

app = Flask(__name__)

@app.route('/', methods=['GET'])
def home():
    return "Homepage"

@app.route('/contact', methods=['GET'])
def contact():
    return "Contact page"

if __name__ == "__main__":
    app.run()
And then the requirements.txt file. This requirements.txt file has an important function because it will tell this service the dependencies needed to run the application. Here are the contents of the requirements.txt file:
Flask And the last one is vercel.json. This file contains configuration and deployment settings for running applications in this service. The contents of this file are in the form of JSON, which regulates the application system flow, such as build settings, routing, environment variables, and others. The following are the contents of vercel.json:
{
    "builds": [
        {
            "src":"app.py",
            "use":"@vercel/python"
        }
    ],
    "routes": [
        {
            "src":"/(.*)",
            "dest":"app.py"
        }
    ]
}
After all the required files have been completed, please upload the source code to your Github repository. Apart from this method, you can also use Vercel CLI, but for those who are still learning, we will only use this method.
3. Create a new project in Vercel and deploy the Flask application
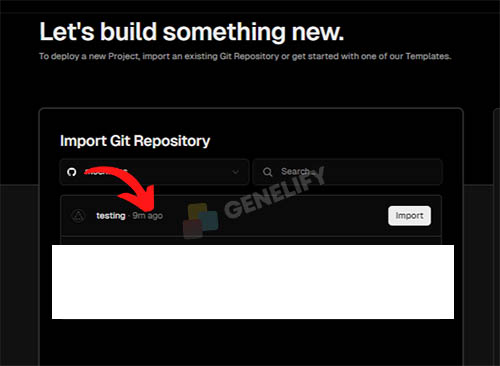
The next step is to create a new project in your Vercel account. Click Add New > Project. At this stage, first connect your Github account with this service. Please import the Flask application repository that you have uploaded. Here we have successfully connected the GitHub account, and all repositories will be showing automatically. Select the repository that suits the one you created, you can see it in the image below (for example):

In the configure project section, fill in the name of the project you want. In the preset framework section, just select "other" because we will use Python. For the root directory section, just ignore it. After OK, continue by pressing the deploy button, wait until the deploy process is complete and successful.
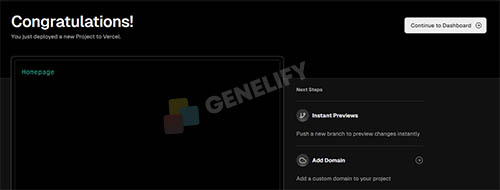
If the deployment process is successful, you will be directed to the page below. Click the Continue to Dashboard button to continue.

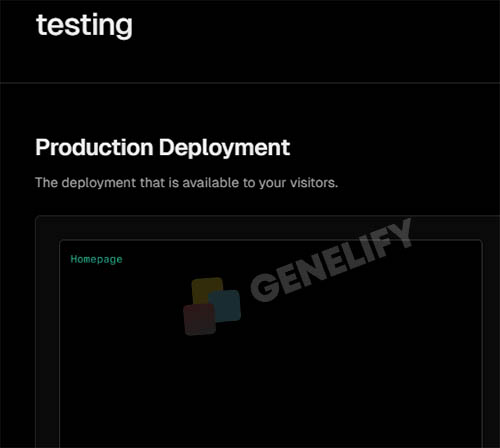
On your project page, please try the project URL with the Flask application that we have created, if the web page displays the text "homepage", that means the application has been successfully run in the service. Please try according to the route that has been determined, you can also modify the source code according to your wishes.
Note: on April 8, 2024, I tried to create a python project into vercel, But I found a build error when creating a new project in Python with the error message: Unable to find any supported Python versions, if you find this error, try changing the node version to 18.x. To do this, from your Vercel project dashboard, select the project, select the settings tab, in the general session, find and change the node.js version from 20.x to 18.x.
Conclusion
Generally, this service is usually used to deploy Node.js-based applications, but it turns out that we can also deploy Python-based applications, including Flask and the Django framework, with a very easy process.
Actually you can also try other Python frameworks besides Flask such as FastAPI, the method is not much different only in the app.py file section you can customize.
Not only can we publish applications based on node.js or PHP, but Python can also be done easily, especially as the free tier of this service offers quite a large resource, 100GB of bandwidth per month.

